Quick answer: Laptop overheating almost always comes down to one of three things: a fan choked with dust, thermal compound that dried out years ago, or heatsink fins so blocked they can’t move air. Clean the fan, flush the fins, swap the thermal paste, and the problem goes away in most cases. Anyone willing to work through a structured laptop repair course can handle this repair safely in a few hours and start charging for it that same week.
Picture this: a customer walks in with a laptop that shuts itself down every 20 minutes. They’re convinced it needs a new motherboard. You remove the bottom panel, pull the fan assembly, and find a mat of dust thick enough to felt a hat. Ten minutes later the machine runs cool, the customer is genuinely amazed, and you just made a skilled-trade profit on a repair that costs almost nothing in parts.
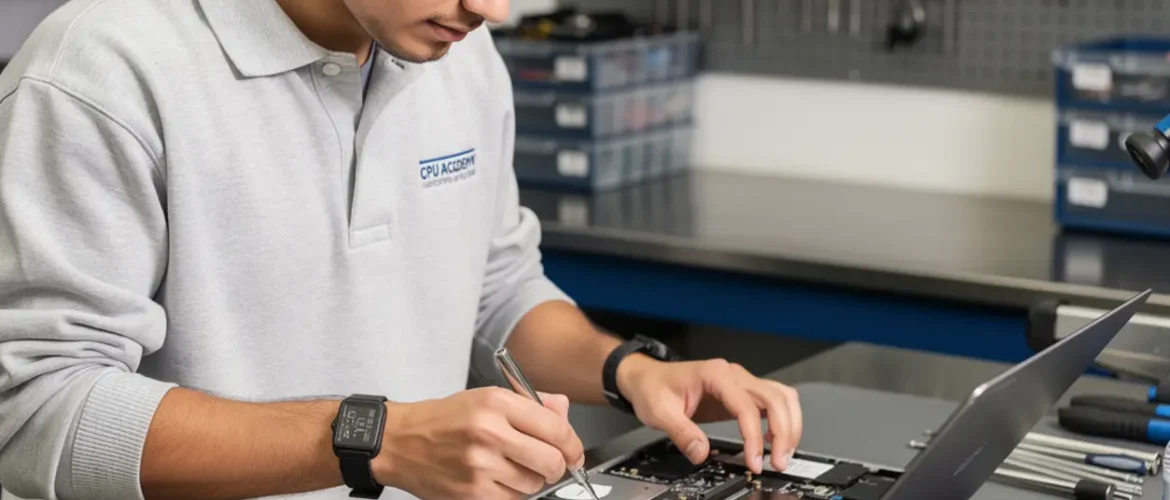
That’s the real promise of thermal service work. It’s one of the highest-demand, lowest-parts-cost repairs a technician can offer. This guide walks you through the diagnosis, the tools, the exact workflow, and the point where this skill starts paying you back consistently.
Use this article as the preview, then open CPU Academy’s Laptop Repairing Course: Get Certified as a PC Technician to see the full laptop repair roadmap, tools, and course outcomes.
Quick Diagnosis or Decision Summary
Before you touch a single screw, confirm what you’re actually dealing with. Thermal problems share symptoms with failing hard drives, bad RAM, and software issues. You want to rule those out fast so you’re not pulling a machine apart for no reason.
Diagnosis Checklist
⚠️ Beginner Mistake to Avoid
Going straight to disassembly before reading CPU temperature is the most common rookie move. Grab a free system monitor and check temps under load before you open anything. If the CPU climbs above 90°C during light use, thermal failure is almost certain. If temps are normal, the problem is somewhere else entirely.
- ☐ Run a hardware temperature monitor and note idle vs. load CPU temps
- ☐ Listen to the fan — is it spinning sluggishly, grinding, or completely silent when it should be loud?
- ☐ Hold your hand near the exhaust vent — is hot air coming out, or almost nothing at all?
- ☐ Check the bottom vents for visible lint or dust blockage
- ☐ Ask the customer when the laptop was last serviced (many have genuinely never been opened)
- ☐ Confirm there’s been no recent liquid spill, which changes the repair path entirely
If the fan is grinding or completely silent and the exhaust vent is barely moving air, you have your answer. Thermal service is the right next step.
Tools, Parts, and Safety Checks
What You Need on the Bench
Good thermal work doesn’t require expensive equipment. You need the right small tools, a clean ESD mat to work on, and one or two quality consumables. That’s really it.
| Item | Purpose | Notes |
|---|---|---|
| Phillips #0 and #1 screwdrivers | Bottom panel and heatsink screws | Magnetic tip helps with tiny screws |
| Plastic spudger / pry tool | Opening bottom panels without scratching | Never use metal on plastic clips |
| Compressed air can or hand blower | Clearing dust from fins and fan blades | Hold the fan still while blowing |
| Isopropyl alcohol (90%+) | Removing old thermal compound | Let it evaporate fully before reassembly |
| Thermal paste (quality mid-range) | New bond between CPU die and heatsink | A rice-grain size is enough |
| Anti-static wrist strap | Protecting sensitive components | Required — not optional |
| Soft lint-free cloth or cotton swabs | Cleaning the CPU die and heatsink base | Microfiber works well |
| Small container or magnetic parts tray | Keeping screws sorted by panel location | Draw a simple diagram if needed |
Safety Note Before You Start
Always disconnect the battery before you touch any internal components. On most modern laptops the battery connector is the first cable you unplug after the bottom panel comes off. Lay the machine on a proper ESD mat — a half-open laptop balanced on a towel is how components get damaged before the real work even starts.
Static discharge can kill a motherboard in a fraction of a second. Your wrist strap clipped to the mat isn’t optional, it’s the baseline. HP’s official guidance for reducing heat inside a laptop also recommends keeping vents unobstructed and scheduling periodic cleaning, which lines up exactly with what you’ll do here.
Step-by-Step Workflow
Replacement and Cleaning Steps
Work slowly, especially on your first few machines. Stripped screws and cracked clips are the most common beginner injuries on laptops, and they cost more to fix than the original problem.
Step 1 — Power down and disconnect. Shut the laptop down fully (not sleep or hibernate), unplug the charger, then remove or disconnect the battery.
Step 2 — Remove the bottom panel. Unscrew all bottom screws and store them in order in a parts tray. Use your plastic spudger to work the clips around the edge. Most modern panels have 6 to 12 clips, and they respond to steady lateral pressure, not force.
Step 3 — Document before you touch anything else. Take a clear photo of the interior with your phone. That image is your map for reassembly, and you’ll be glad you have it.
Step 4 — Disconnect the fan cable. The fan has a small ribbon or wire connector going to the motherboard. Lift it straight up, or slide the locking tab and pull gently. Never yank sideways on a ribbon connector.
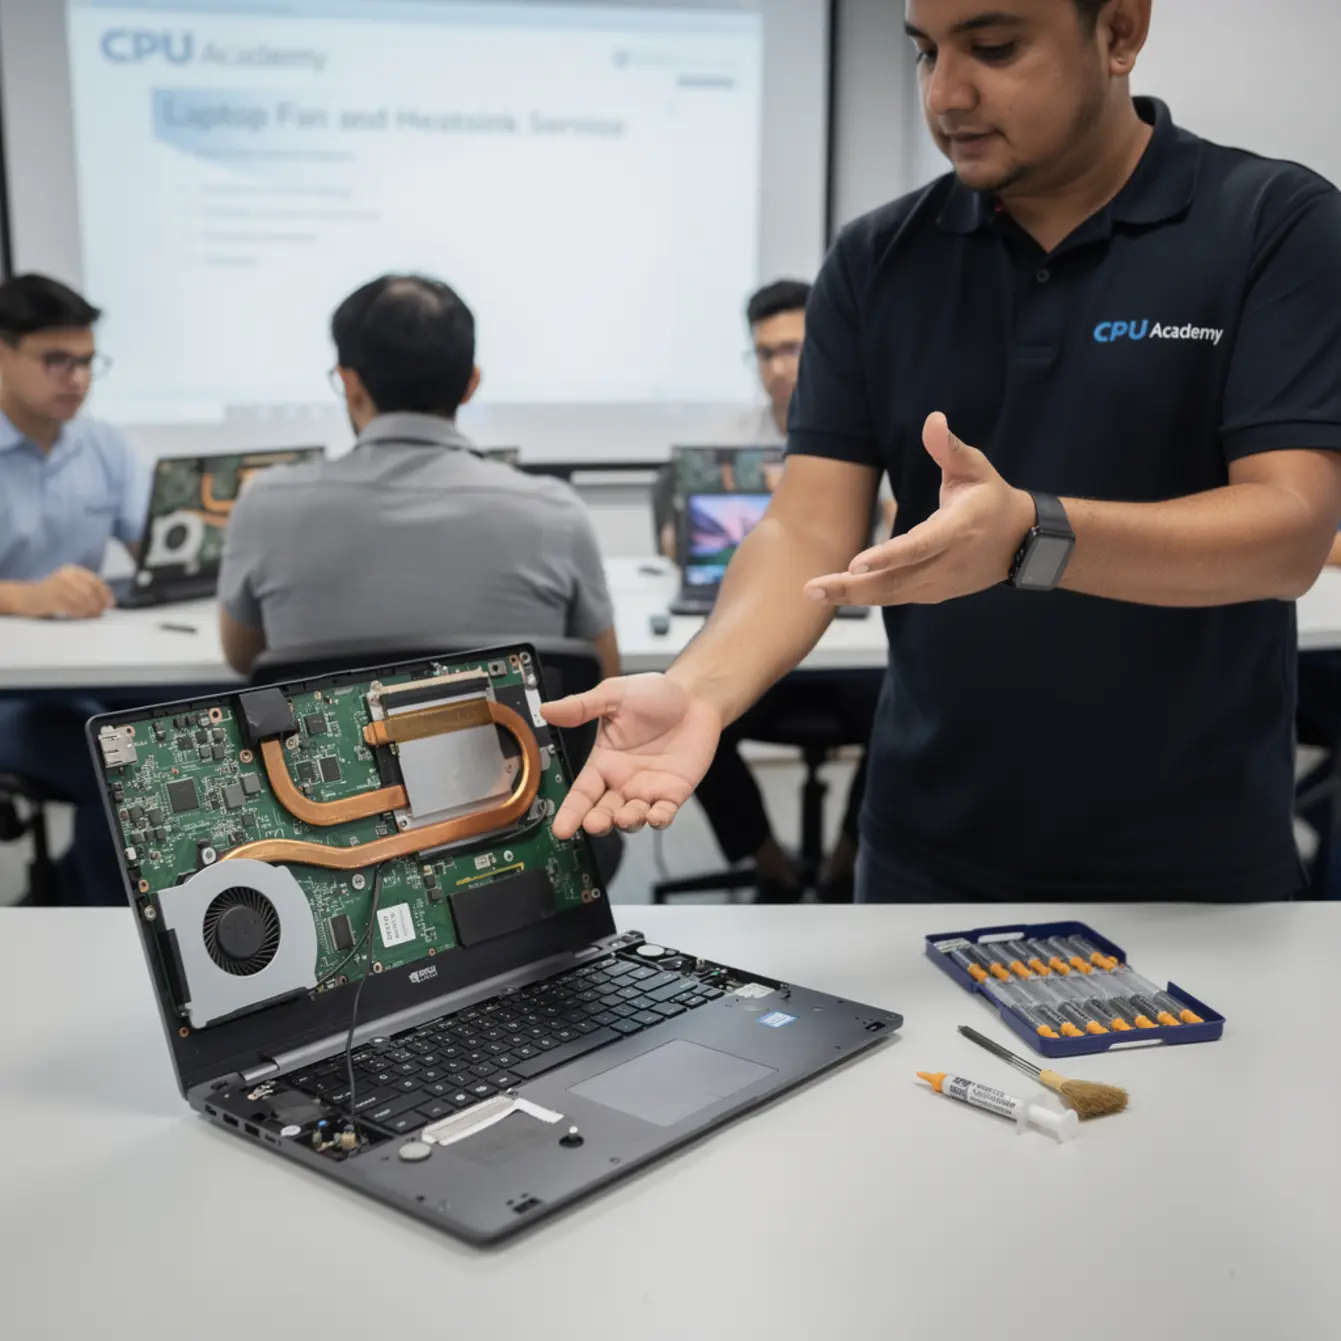
Step 5 — Unscrew the heatsink in numbered order. Most heatsinks have screws marked 1, 2, 3, 4. Remove them in that sequence to release pressure evenly and protect the CPU die underneath. Skipping that order is how you get a cracked die on an older machine.
Step 6 — Lift the heatsink and fan assembly. Pull it straight up, no rocking. You’ll see the old thermal compound right away. It might look grey and chalky, or dark and completely dried out.
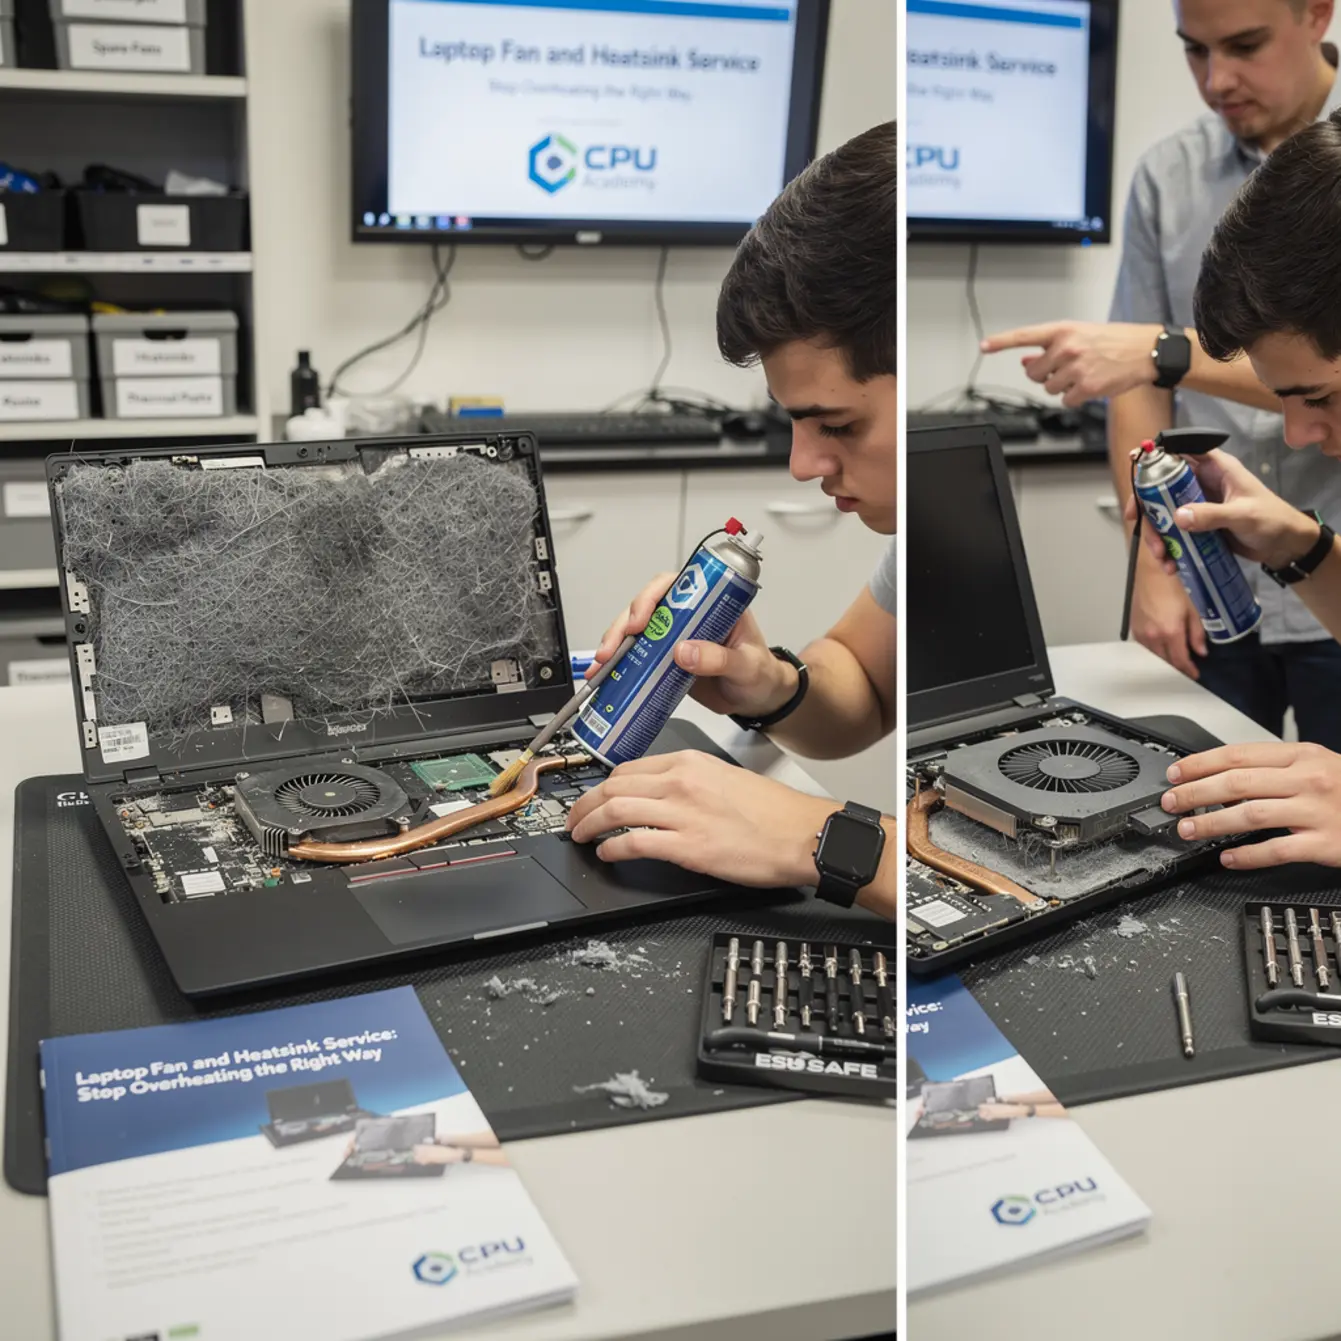
Step 7 — Clean the heatsink fins. Use compressed air to blast dust from between the fins. If the fins are caked solid, a soft brush and blower together get better results than air alone. Clear every lint plug from the exhaust channel.
Step 8 — Clean the CPU die and heatsink base. Apply a small amount of isopropyl alcohol to a lint-free cloth and wipe both surfaces until the old paste is completely gone. Let them dry fully before moving on. Rushing this step and trapping moisture under fresh paste is a mistake beginners make once.
Step 9 — Apply fresh thermal paste. Place a rice-grain-sized dot in the center of the CPU die. Don’t spread it manually. The heatsink pressure distributes it correctly on its own.
Step 10 — Reinstall in reverse order. Heatsink screws go back in numbered sequence, fan cable reconnects, the bottom panel clips back into place around the perimeter, then screws tightened gently until snug.
Testing Workflow
Boot the laptop and pull up your temperature monitor before the bottom cover goes back on permanently. Watch the numbers for a few minutes at idle, then run a sustained load like a video render or a benchmark tool.
At idle, most laptop CPUs should sit below 50°C. Under load, anything below 85°C is a solid result for most consumer hardware. If it’s still climbing above 90°C under light use, check that the heatsink is seated flat and that every numbered screw is fully tightened. A loose screw 3 will cost you 10 degrees right there.
Typical Failure Patterns and Shortcuts
Knowing what you’re likely to find before you open the machine cuts diagnosis time in half. Most thermal failures fit one of these four patterns, and recognizing them early keeps the repair clean.
Pattern 1 — Dust mat in the exhaust tunnel. This is by far the most common finding. The fan runs fine, but it’s pushing air against a solid wall of compressed lint. The fix is cleaning and clearing the channel completely.
Pattern 2 — Dried thermal compound. Laptops three to five years old often have paste that has turned to a grey powder. The CPU and heatsink have lost meaningful thermal contact. Clean both surfaces and repaste.
Pattern 3 — Failing fan bearing. A grinding, rattling, or clicking noise tells you the fan is wearing out. Cleaning won’t fix a bad bearing. Replacement fans are widely available by laptop model number and are usually inexpensive.
Pattern 4 — Bent or warped heatsink. Rare, but it happens after a drop. The heatsink base no longer sits flush against the CPU die, and even fresh paste can’t bridge a physical gap. Replacement is the only real fix here.
A practical shortcut worth building into your habit: if the laptop is a common model like a Dell Inspiron or HP Pavilion, search the model number plus “disassembly” before you start. Other technicians have posted teardown notes showing exactly which screws hide under rubber feet or stickers. Finding a hidden fastener from a forum note beats snapping a clip because you didn’t know it was there.
When This Skill Becomes Billable Work
Upsell Opportunities Around Thermal Service
Thermal service is almost never a one-problem visit. With the machine already open in front of you, you’re in the best possible position to spot other issues and flag them while the customer is already committed to a repair conversation.
Common upsells spotted during thermal service:
- Cracked or failing display hinges, which connect directly to screen replacement work
- Worn keyboards with stuck or missing keys, a natural lead-in for customers who need laptop keyboard repair training skills applied to their machine
- Loose or corroded power jack, which is directly relevant if you’ve also built laptop power jack repair course knowledge into your toolkit
- Liquid residue on the motherboard, often invisible until the machine is open and lit properly, a finding that calls for liquid damage assessment from a solid laptop liquid damage repair course background
Every one of those is a separate billable repair. A customer who came in about overheating can leave with a quote for three additional services, all of which you can handle confidently if your training covers the full repair picture.
That’s exactly the scenario where a structured laptop repair course online pays for itself fast. You’re not guessing at each new problem. You already know the safe procedure going in.
Case Example: The Dusty Gaming Laptop
A customer brought in a four-year-old gaming laptop throttling under load and shutting down mid-session. Diagnosis showed CPU temps peaking above 95°C within three minutes of gameplay. The heatsink fins were completely blocked with a dense plug of lint and pet hair. The technician cleaned the fins, replaced the dried thermal paste, and confirmed temps dropped below 80°C under the same load. While the machine was open on the ESD mat, a loose power jack and a cracked hinge both turned up on inspection. Those became two separate follow-up repairs. One thermal service visit, three billable outcomes.
If you want to push beyond thermal work, the laptop screen replacement course at CPU Academy covers panel removal and replacement with the same practical focus — another high-demand repair with low parts risk and clear demand. And if your longer-term goal is building a shop rather than just doing repairs, Starting a Mobile Phone Repair Business walks through what running the business side actually looks like day to day.
CPU Academy fits laptop learners who want safe disassembly habits, profitable common repairs, and a clearer path from skill to income. The course is built for someone who wants to move from zero to billable work quickly, without picking up dangerous shortcuts that come back to bite them on a customer’s machine. Think of the learner who wants skills they can sell fast, not 80 hours of theory before they’re allowed to touch a real device.
FAQ + Next Step
Frequently Asked Questions
How often should I clean a laptop fan and heatsink?
For a typical home laptop, once every 12 to 18 months is a reasonable schedule. A machine used in a dusty workshop, or in a home with pets, may need service every 6 to 9 months. The clearest signal is sustained high temperature during normal everyday use, not just gaming or heavy workloads.
Is thermal paste application hard for a beginner?
Honestly, not really. The main mistake beginners make is applying too much paste or trying to spread it manually across the die. A small center dot and firm heatsink pressure gives consistent coverage every time. The cleaning step matters more than the application itself. Old compound that isn’t fully removed will compromise any fresh paste you put down.
What if the laptop still overheats after cleaning and repasting?
First, check that the heatsink screws are fully tightened in the correct numbered sequence. Then confirm the fan is actually spinning at the right speed under load. If those both check out, inspect the heatsink base for physical damage or warping. A warped heatsink cannot make full contact no matter how good the paste is. At that point, replacement is the only real fix.
Do I need a laptop repair course to do this work?
You can follow a guide for a single repair on your own machine, sure. But if you want to do this work professionally, spotting the right failure pattern, avoiding damage to surrounding components, and handling the model variations you’ll run into in a real shop, a structured laptop repair course closes the gaps that one-off tutorials leave wide open. There’s a real difference between fixing your own laptop once and confidently fixing anyone’s laptop under time and cost pressure.
How long does a full thermal service take?
An experienced technician can usually get through it in 30 to 45 minutes. A beginner working carefully should plan for 60 to 90 minutes the first few times. Speed comes from knowing where the screws are hidden, how specific clip systems behave, and having the right tools within arm’s reach on a clean bench. All of that improves quickly with guided, deliberate practice.
Which laptop repair course is best for beginners?
Look for a course that covers real disassembly on common models, explains why each step matters and not just how to do it mechanically, and ties repair skills directly to income outcomes. CPU Academy’s laptop course is built around exactly that scope: practical repairs, safe habits, a laptop motherboard repair certification path, and a clear line from learning to earning.
Ready to Make This Skill Pay?
Thermal service is one repair. The full picture, screen replacement, keyboard work, power jack diagnosis, liquid damage assessment, is what turns a skill into a reliable income stream. A structured laptop repair course gives you all of it in the right order, without the expensive trial-and-error on a paying customer’s machine.
CPU Academy built its course for learners who want to move from zero to billable work without picking up dangerous habits along the way. Ready to learn laptop repair in a structured way instead of collecting scattered tips? Open CPU Academy’s Laptop Repairing Course: Get Certified as a PC Technician and take the next step now.
Open the Laptop Repairing Course: Get Certified as a PC Technician →