
Blog
FREE: Laptop Liquid Damage — First 48 Hours Guide
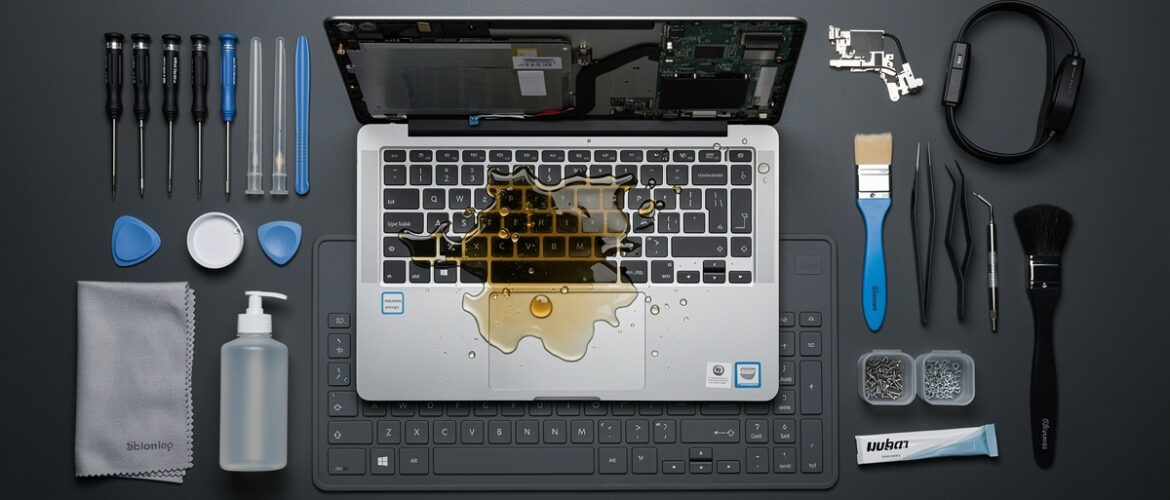
Every technician — beginner or pro — will eventually face a panicked customer walking in with a soaking wet laptop. The first 48 hours after a liquid spill are the difference between a full recovery and a dead board. This guide gives you the exact step-by-step response plan so you never freeze, never guess, and never make the mistake that turns a fixable laptop into an expensive paperweight.
What You Get Inside
This guide walks you through the critical first 48 hours after a laptop takes a liquid hit — whether it’s water, coffee, soda, or something worse. Follow these steps in order. Speed and sequence both matter.
Step 1: Kill the Power — Right Now
The single most important thing you can do in the first five seconds is remove power from the laptop. Liquid and electricity running at the same time causes short circuits that permanently destroy components on the motherboard.
- If the laptop is on, do not shut it down through the OS — hold the power button for 5 seconds to force it off immediately.
- Unplug the AC adapter from the wall and from the laptop.
- If the laptop has an external removable battery, pop it out now. Do not look for a screwdriver first — if it’s a push-release battery, release it.
- If the battery is internal (most modern laptops), you need to open the back panel and disconnect the battery connector from the motherboard before you do anything else. This is your top priority.
Step 2: Do Not Press Any Keys or Turn It On
Once the spill happens, touching the keyboard or trying to test if it still works forces liquid deeper into the board. Tell your customer this the moment they walk in. If they already pressed keys — note it, because it increases the damage risk.
- Do not test the display.
- Do not plug it in to “see if it charges.”
- Do not blow air into the keyboard with your mouth — saliva makes it worse.
Step 3: Position It Correctly to Drain
Gravity is your first tool. The goal is to let liquid drain away from the motherboard, not toward it.
- Open the laptop to a 90-degree angle.
- Flip it upside down so the keyboard faces the table — this creates a tent shape.
- Place it on a dry towel or paper towels to absorb runoff.
- Leave it in this position for at least 30 minutes before touching it again.
What type of liquid was it? Water is the most forgiving. Coffee, soda, juice, and anything with sugar or salt is far more corrosive — these leave residue that continues to eat at the board even after it dries. Note this for your repair log.
Step 4: Disassemble and Inspect
Now it’s time to open the machine. Work clean, work organized, and work fast.
- Remove all external components first: USB drives, SD cards, headphone cables, anything plugged in.
- Remove the back panel using the correct screwdriver (most laptops use Phillips #0 or #1). Keep screws organized by position in a magnetic tray or tape them to a labeled piece of paper.
- Disconnect the battery connector from the motherboard if you haven’t already — this is non-negotiable before you go further.
- Remove the RAM sticks and inspect the contacts. Liquid on RAM contacts causes boot failures.
- Remove the SSD or hard drive — the customer’s data is on here and protecting it is part of your job.
- Inspect the motherboard under a good light source. Look for visible liquid pooling, white or green corrosion spots, or residue trails.
- Photograph everything before you move any cables or components. You’ll thank yourself during reassembly.
Step 5: Clean the Board
Isopropyl alcohol (IPA) is your best friend here. Use 90% concentration or higher — lower concentrations contain too much water.
- Apply IPA to a soft-bristle brush (a toothbrush works) or a lint-free swab.
- Gently scrub any visibly contaminated areas on the motherboard — focus on corrosion spots and residue trails.
- Use a lint-free cloth or swab to blot — do not wipe hard, as this can dislodge surface-mount components.
- Allow the IPA to fully evaporate before proceeding. IPA evaporates quickly at room temperature — give it 5 to 10 minutes.
- If you have an ultrasonic cleaner, this is the right time to use it for a thorough clean. If not, repeat the brush-and-blot process at least twice.
Do not use compressed air at close range on the motherboard — it can push liquid into sockets and blow tiny components off the board.
Step 6: Dry — The Full 24 to 48 Hours
This is where most beginners get impatient and blow the repair. You need adequate drying time before powering on.
- Place components in a dry, warm environment — room temperature is fine. Avoid direct sunlight or high heat.
- A desiccant packet (silica gel) placed near the components speeds up moisture absorption. Rice is a myth — it does not work effectively and leaves starch dust on your components.
- If you have a repair bench with a low-heat drying station or a food dehydrator set to under 40°C (104°F), this accelerates the process safely.
- Wait a minimum of 24 hours. For heavy spills or sugary liquids, wait the full 48 hours.
Step 7: Reassemble and Test
After the full drying window, reassemble in reverse order. Connect the battery last. Then follow this test sequence:
- Connect power — watch for any smoke, smell, or unusual heat. If you notice any of these, disconnect immediately.
- Press the power button and observe. Does the fan spin? Do any lights come on?
- If it boots, test the keyboard, trackpad, display, USB ports, and Wi-Fi.
- Run a quick diagnostic or stress test to check for intermittent failures under load.
- If it does not boot, the motherboard likely has sustained short-circuit damage — this requires board-level diagnosis and possibly component replacement.
Quick Reference: What to Tell the Customer Right Away
- “Do not try to turn it on again before bringing it in.”
- “The faster you get here, the better the outcome.”
- “Bring the charger with you.”
- “Tell me exactly what type of liquid it was.”
Want to Go Deeper?
This guide gives you the emergency response down cold — but when you’re ready to diagnose board-level damage, understand what actually gets fried in a spill, and build the skills to handle any laptop repair job with confidence, that’s exactly what the full Laptop Repairing Course covers. It takes you from first principles all the way to real-world repair jobs, step by step.
📥 Download Your Free PDF
Download the PDF version so you have this exact checklist taped to your bench or saved on your phone — ready the moment a spill job walks through your door.
Free account required · 30 seconds to sign up · Download instantly
Leave a Reply
You must be logged in to post a comment.