A laptop that throttles, shuts down without warning, or runs hot enough to burn your lap usually has one root cause: a clogged heatsink or dried-out thermal paste. These are not mysterious failures. They are predictable, fixable, and once you know the steps, surprisingly fast to resolve.
If you are working through a laptop repair course or thinking about starting one, cooling service is the repair you will do most often. It is also one of the most profitable because the parts cost almost nothing and the result is dramatic. A customer who walked in ready to throw the machine away walks out genuinely relieved.
Use this article as the preview, then open CPU Academy’s Laptop Repairing Course: Get Certified as a PC Technician to see the full laptop repair roadmap, tools, and course outcomes.
Quick Diagnosis: Is It Really a Cooling Problem?
Before you open a single screw, confirm the symptom. A cooling failure shows up in a recognizable pattern, and ruling it out fast saves you from chasing the wrong fix entirely.
Diagnosis Checklist
| Symptom | Likely cause | Confirm with |
|---|---|---|
| Random shutdown under load | Thermal cutoff triggered | CPU temp reading (HWMonitor or similar) |
| Fan spinning at full speed all the time | Heatsink fins clogged with dust | Visible dust at exhaust vent |
| Slow performance on a fast CPU | Thermal throttling reducing clock speed | CPU usage vs clock speed in Task Manager |
| Hot bottom case near center | Heat not moving away from die | Touch test + temp reading |
| Normal temps, still slow | Software or storage issue — not thermal | Rule out cooling; move to other diagnosis |
Intel’s own guidance on Intel processor thermal management explains that most consumer CPUs reduce clock speed automatically before they reach a damaging temperature. That is exactly why “it just runs slow” is often a thermal complaint in disguise, not a software problem or a failing drive.
If two or more rows in that table match the machine in front of you, you almost certainly have a cooling job on your hands. That is good news. It is one of the cleanest, most repeatable repairs you can learn, and the before-and-after difference is hard to miss.
Tools, Parts, and Safety Checks
Getting this repair wrong is less about skill and more about skipping a safety step. Run through the list below before you ever touch the motherboard.
Tools You Need
- Precision screwdriver set — Phillips #00 and #0 cover most laptop brands
- Plastic spudger or pry tool — metal scratches chassis and connectors
- Anti-static wrist strap — clip it to bare metal before touching the board
- Isopropyl alcohol (90% or higher) — for cleaning old paste off the CPU die and heatsink
- Lint-free swabs or microfibre cloth — paper towel leaves fibres behind
- Compressed air canister — flush dust from fins without disassembling the fan
- Thermal paste — a small syringe of quality compound; one tube handles dozens of jobs
- Plastic tweezers — for repositioning small cables without shorting
Safety Note
Choosing Thermal Paste
There are three main types worth knowing: silicone-based, metal-based, and carbon-based compounds. For most laptop service work, a quality non-conductive silicone or carbon compound is the safe choice. A spill onto the motherboard will not short anything.
Metal-based compounds conduct electricity and require more precision during application. Avoid toothpaste, cooking grease, or any substitute — they dry out within weeks and make the next technician’s job harder than it needs to be.
Step-by-Step Workflow
The steps below apply to the majority of modern thin-and-light laptops. Exact screw locations vary by brand, but the sequence stays the same. Picture the machine half-open on an ESD mat, screws sorted into labeled sections by size and location. That image is what a clean, professional job looks like before the first component comes off.
Disassembly Steps
- Document before you open. Take photos of the bottom panel before removing any screws. Group and label screws by location — base, keyboard bezel, and heatsink screws are often different lengths, and one wrong-length screw in the wrong hole can puncture a battery or trace.
- Remove the bottom panel. Start at one corner with a plastic spudger. Work slowly around the edge. Most modern laptops use a combination of screws and plastic clips; forcing a clip breaks it permanently, and replacements can be hard to source.
- Disconnect the battery. Locate the battery connector on the motherboard and lift it straight up. Do this before touching anything else inside, every single time.
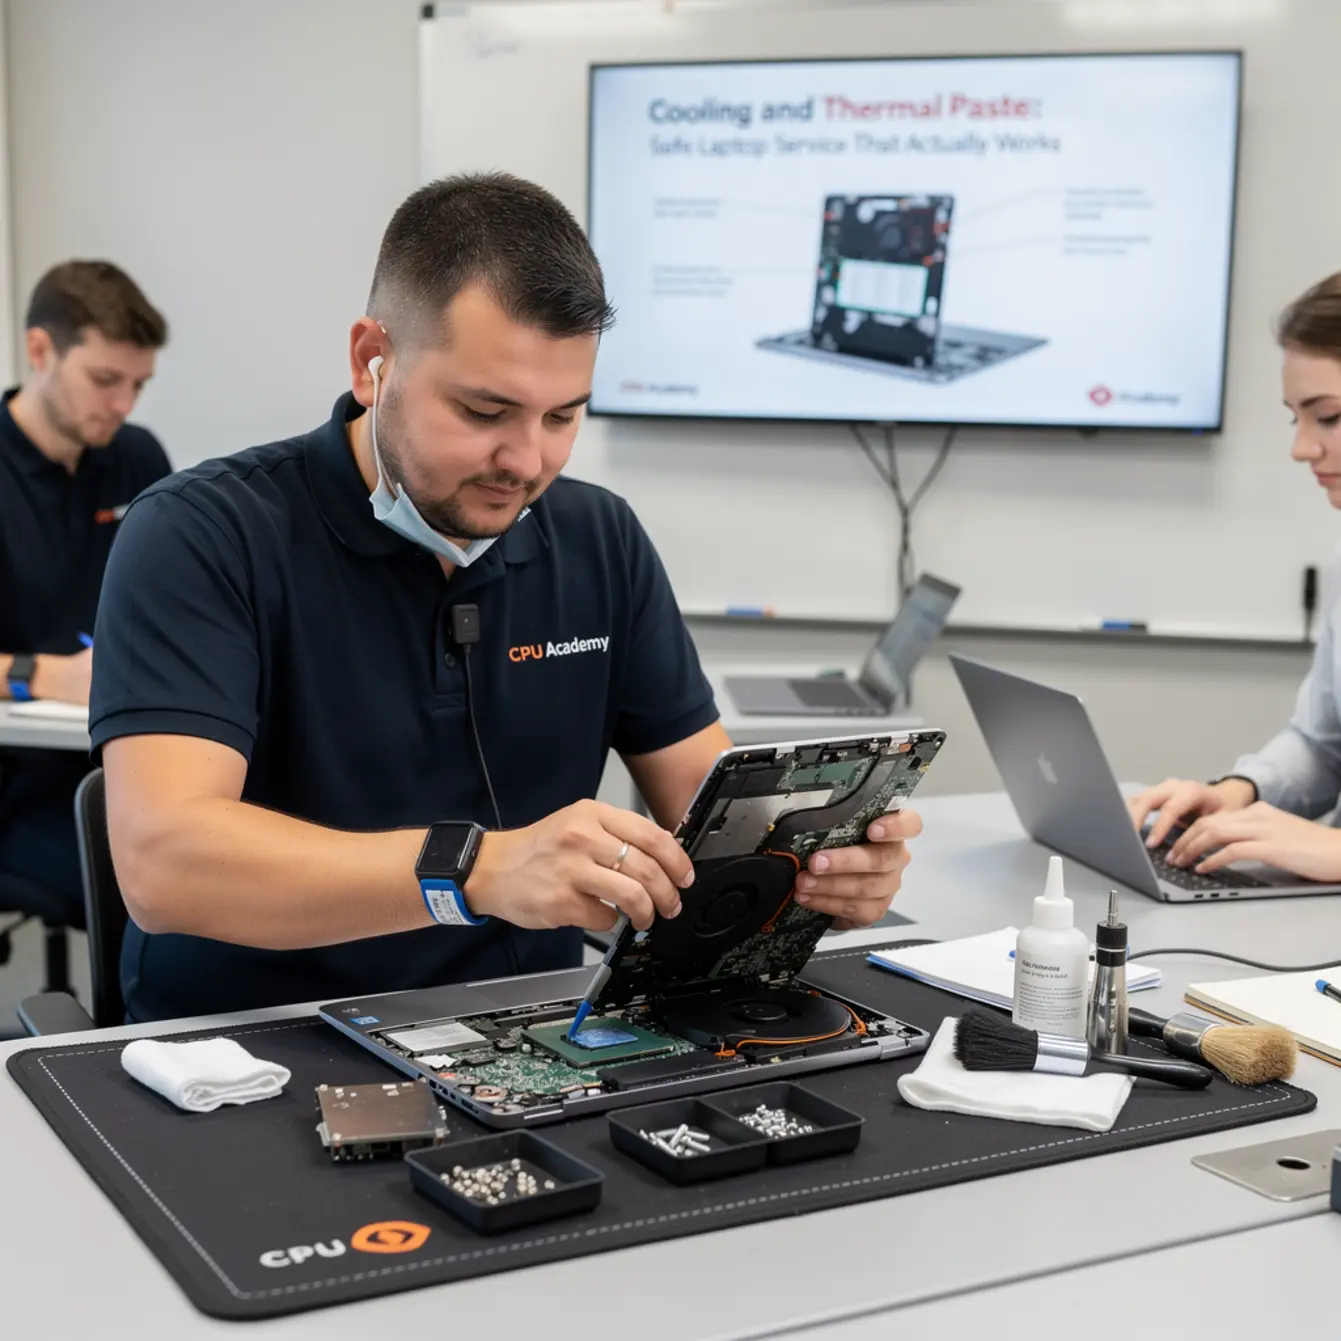
- Clear the fan and fins. Use short bursts of compressed air aimed at the heatsink fins from the outside exhaust vent. Hold the fan blade still with a finger or toothpick so it does not spin from the air blast — free-spinning can damage the fan bearing.
- Remove the heatsink. Most laptop heatsinks have three to four screws in a numbered sequence. Loosen them in reverse order (4-3-2-1) to release pressure evenly and avoid warping the contact surface. Lift the heatsink straight up — do not slide it sideways while it is still adhered with old paste.
Cleaning and Paste Application
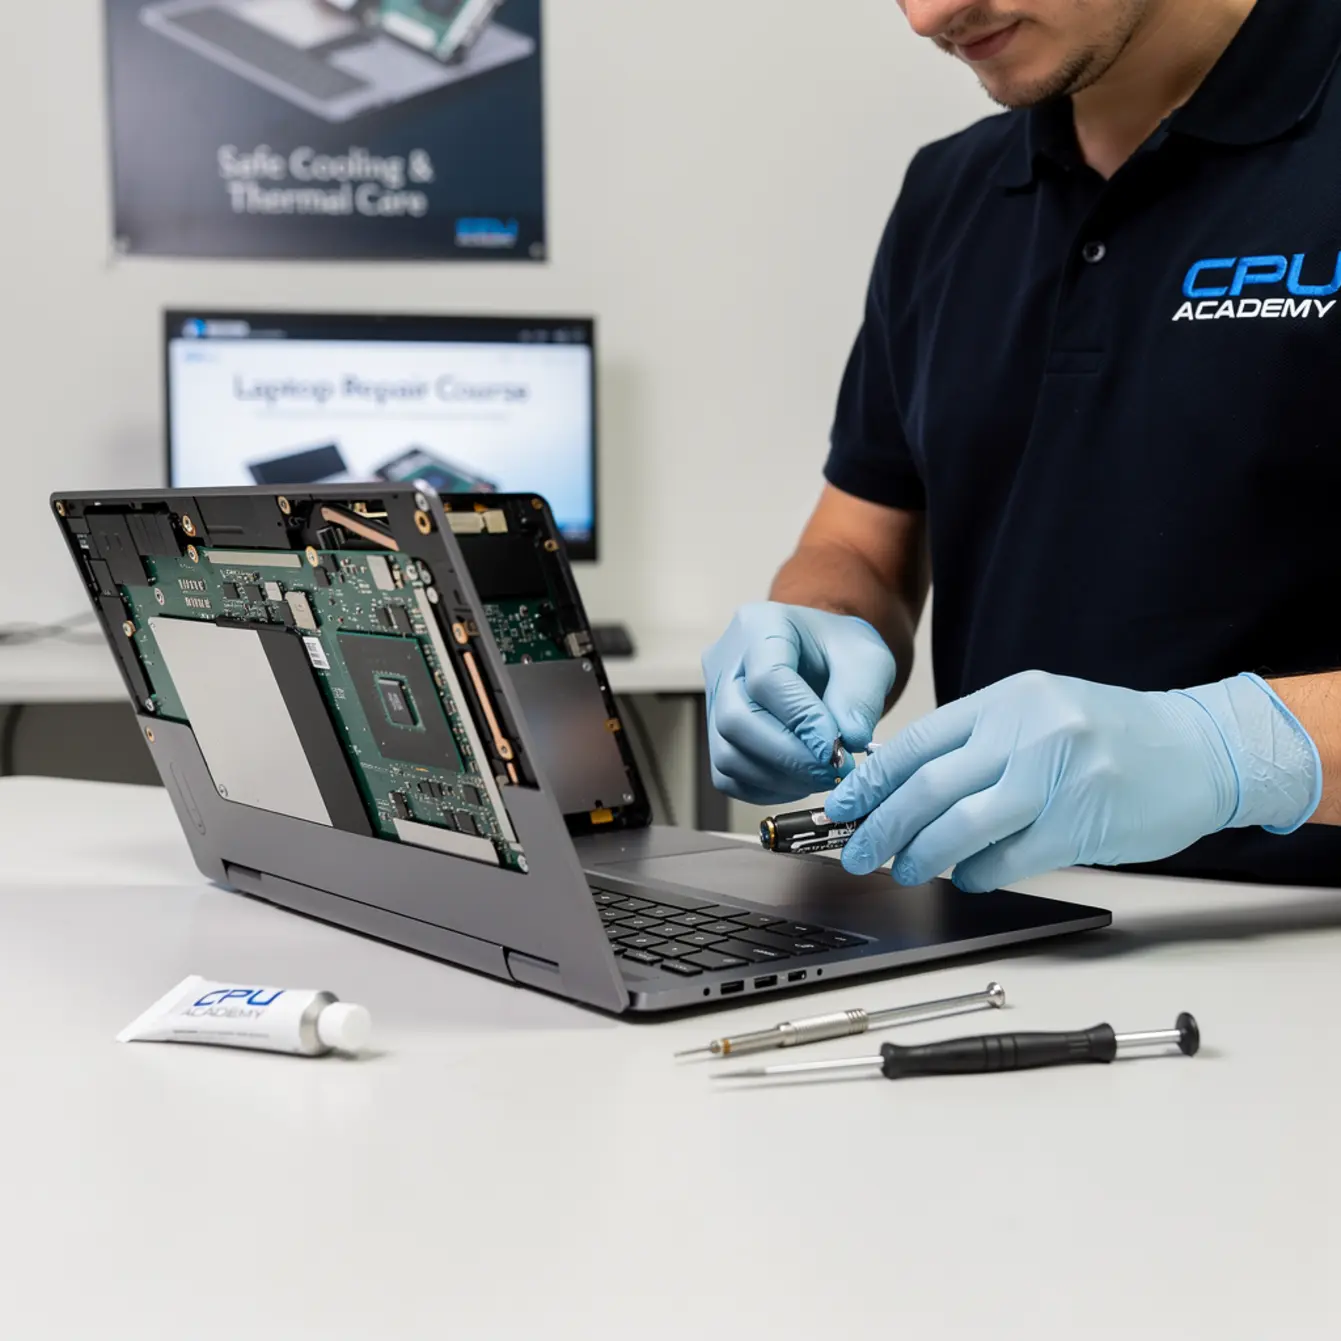
- Clean both surfaces. Apply a few drops of isopropyl alcohol to a lint-free swab and wipe the old paste from the CPU die and the heatsink contact pad. Old paste often looks dark brown or chalky after a few years. Work in one direction — do not scrub in circles. Let both surfaces dry fully before applying new compound, which takes about 30 seconds.
- Apply new thermal paste. A pea-sized dot in the center of the CPU die is enough for most processors. The clamping pressure from the heatsink spreads it evenly. More paste does not mean better cooling. Excess compound can spill onto nearby components and cause problems that have nothing to do with temperature.
- Reattach the heatsink. Lower it straight down onto the die. Tighten the screws in the numbered sequence (1-2-3-4) to apply even clamping pressure across the surface. Snug is enough — do not overtighten on a laptop. The board flexes, and cracked solder joints from over-torqued heatsink screws are a real and annoying failure mode.
Reassembly and Testing Workflow
- Reconnect the battery. Confirm it clicks firmly into the connector before you go anywhere near the bottom panel.
- Replace the bottom panel. Start at one corner, press the clips in by hand, and work around the edge. Add screws last.
- Boot and monitor temperature before the cover goes back on for good. Reconnect the battery, power the machine on with the bottom panel loose but seated, and open a temperature monitoring tool. Run the laptop under load for five minutes. A healthy laptop CPU should stay well below the manufacturer’s maximum junction temperature during normal use. If you see temperatures drop 15 to 25°C compared to before the service, the repair worked. Only then snap the panel fully into place.
Typical Failure Patterns and Shortcuts
Once you have done a dozen of these jobs, you start seeing the same mistakes show up again and again. Knowing them before they happen saves time and protects your reputation with paying customers.
Beginner Mistakes to Avoid
- Applying too much paste — blobs do not spread better; they spill onto things they should not touch
- Skipping the anti-static strap “just this once” — static damage is invisible until the laptop fails days later
- Overtightening heatsink screws — crack risk on thin boards is real
- Forgetting to hold the fan still during compressed-air cleaning
- Using rubbing alcohol below 90% concentration — water content leaves residue on the die
- Not labelling screws — one wrong-length screw in the wrong hole punctures a battery or motherboard trace
Real-World Case Example
A Dell Inspiron came in running at 95°C at idle and shutting down within two minutes of opening a browser. The owner had already replaced the SSD and reinstalled Windows, neither of which touched the actual problem. On opening the bottom panel, the heatsink fins were packed solid with pet hair and dust. Zero airflow was reaching the fan.
After cleaning the fins, replacing four-year-old paste, and reassembling, the same machine idled at 48°C and handled a 30-minute video call without dropping a frame. The owner had been ready to buy a replacement laptop. That story is not unusual — it is the pattern you will see repeatedly once you start doing this work.
Recognizing a straightforward cooling job quickly is part of what separates trained technicians from trial-and-error fixers. The machine was not dying. It was just filthy and starved of airflow.
Upsell Opportunities During a Cooling Job
While the bottom panel is open, you can visually inspect other components at no extra labor cost. Common things to note and flag to the customer: swollen battery cells are visible from above, loose keyboard ribbon cables are easy to spot, and dust in the speaker grilles is obvious once you are in there anyway.
Each of those is a natural follow-on job. If you are also building skills in laptop screen replacement, you already have a second profitable service to offer at the same appointment without any extra diagnostic time.
When This Skill Becomes Billable Work
Cooling service has one of the best effort-to-outcome ratios of any laptop repair. The parts — paste and compressed air — cost a few dollars per job. Labor time on a straightforward machine is under an hour once you are comfortable with it. The customer gets a laptop that behaves like new again, and that result is easy to explain and easy to charge for.
Building a Repair Menu Around This Skill
Cooling service pairs naturally with several other high-demand repairs. Customers who come in for overheating often have secondary issues like a cracked screen or a sticky keyboard. That is where skills from a laptop keyboard repair training course or a laptop screen replacement course move from “nice to have” to genuinely revenue-generating.
Customers with laptop liquid damage repair needs often turn up thermal issues during the cleanup process — corrosion near the fan connector is common after a spill. And machines brought in for a laptop power jack repair often have not been serviced in years, meaning the cooling system is overdue anyway. Bundling the thermal service with the primary repair is honest, practical, and something most customers genuinely appreciate.
CPU Academy fits laptop learners who want safe disassembly habits, profitable common repairs, and a clearer bridge from skill to income. The structured course path means you are not piecing together random YouTube tutorials — you are building a repeatable workflow you can charge for with real confidence.
If you are also thinking about the business side — pricing, finding customers, building a local reputation — the Starting a Mobile Phone Repair Business course at CPU Academy covers the business foundations that apply equally well to laptop service work.
FAQ + Next Step
Frequently Asked Questions
- How often should laptop thermal paste be replaced?
- Most technicians recommend every three to five years under normal use, or any time you see temperatures that are unexpectedly high for the hardware. Heavy daily use or a warm environment shortens that window noticeably.
- Can I damage a laptop by applying too much thermal paste?
- Yes. Excess paste can overflow the CPU die and reach capacitors or the socket area. A pea-sized amount in the center is the right starting point for most laptop processors. When in doubt, use less rather than more.
- Do I need special training to do this repair safely?
- The steps are learnable by most people, but skipping safety habits — especially static discharge prevention and battery disconnection — leads to damage that is expensive and invisible until days later. A structured course teaches the habits alongside the steps, which makes a real difference.
- Is a laptop repair course online good enough to learn this skill properly?
- For cooling service and most common repairs, yes — as long as the course includes real disassembly walkthroughs and covers safety procedures, not just theory. Look for courses that show the full workflow on actual hardware, not slides with labeled diagrams.
- What if the laptop still runs hot after a paste replacement?
- Check that the heatsink screws are torqued evenly and that no air gap exists between the contact surfaces. Also verify the fan is spinning freely. If temperatures stay high, a worn or failing fan may need replacement. It is also worth confirming the issue is not software-side thermal throttling that has nothing to do with the physical cooling system.
- Which laptops are hardest to service for cooling?
- Ultra-thin models from any brand tend to use non-standard screws, fragile clips, and tightly routed cables near the heatsink. Build confidence on mid-range business laptops first. They are designed with serviceability in mind and have far better parts availability when something does go sideways.
- Can this skill combine with phone repair work?
- Absolutely. Many technicians service both laptops and phones. The Phone Repair Course at CPU Academy covers the parallel skills for mobile devices, and a lot of the safety and disassembly habits carry directly across from one to the other.
Your Next Practical Step
Cooling service is one of those repairs where confidence comes from doing it right the first few times, not from watching someone else do it on a screen. The safe habits — static protection, battery disconnect, screw labelling, correct paste quantity — are not complicated. But they need to be learned in order, with someone explaining why each step matters before you skip it.
A structured laptop repair course gives you that context. You learn the workflow, the failure patterns, the upsell opportunities, and the business logic all in one place instead of scattered across forums and video channels that may or may not agree with each other.
Ready to learn laptop repair in a structured way instead of collecting scattered tips?
Open CPU Academy’s Laptop Repairing Course: Get Certified as a PC Technician and take the next step now.
CPU Academy is the right fit for learners who want safe disassembly habits, profitable repair skills, and a clear path from learning to earning — without picking up expensive mistakes along the way.