
Blog
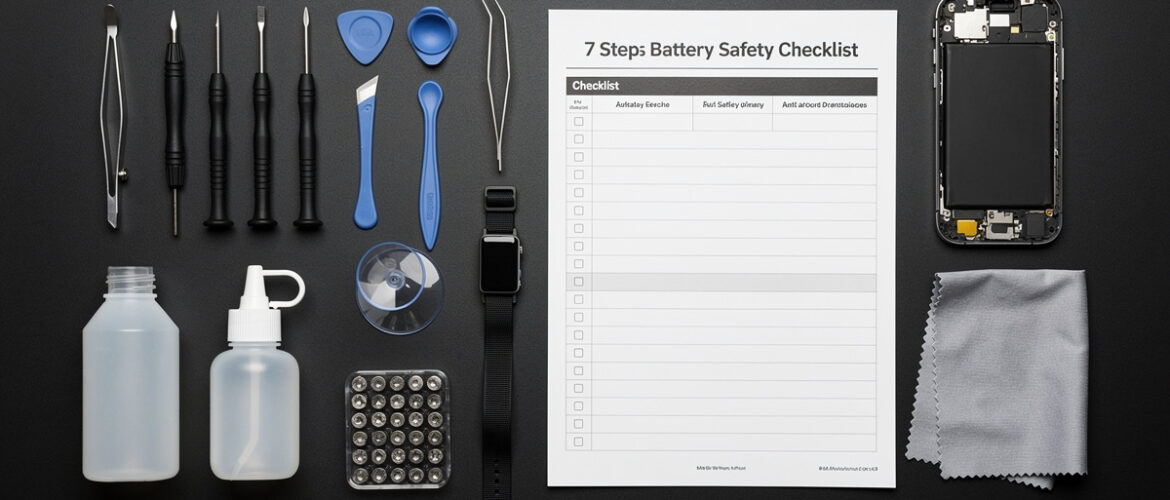
FREE: 7-Step Phone Battery Swap Safety Checklist (PDF)
Most phone battery replacements go wrong in the first five minutes — before anyone even touches the battery. A punctured lithium cell doesn’t give you a warning; it gives you a fire. This checklist exists because every beginner deserves a clear, step-by-step safety sequence they can follow before, during, and after a battery swap — no guesswork, no YouTube rabbit holes, no expensive mistakes.
What You Get Inside
Print this out. Tape it to your workbench. Run through it every single time you swap a battery — whether it’s your first repair or your fiftieth. Skipping steps is how good repairs go bad.
Why Battery Safety Is Non-Negotiable
Lithium-ion batteries store a serious amount of energy in a very small package. A battery that is punctured, bent, overheated, or improperly disconnected can swell, vent toxic gas, or ignite. The good news: every one of those outcomes is preventable with the right preparation. This checklist walks you through exactly that.
Your 7-Step Phone Battery Swap Safety Checklist
-
Power Down the Device Completely
Do not just lock the screen. Hold the power button and fully shut the phone off. A live device during a battery swap means active voltage running through the board. One stray metal tool contacting the wrong pad while the phone is on can fry the logic board instantly. Confirm the screen is black and unresponsive before you pick up a single tool.
- Hold power button until the shutdown slider or menu appears
- Confirm screen is fully off and does not respond to button presses
- Wait 30 seconds after shutdown before opening the device
-
Inspect the Battery Before You Start
If the phone back is bulging, the screen is lifting, or the device feels unusually warm — stop. That is a swollen battery. A swollen lithium battery is already in a compromised state. Do not apply heat to remove it. Do not press on it. Do not puncture it. Place the phone on a fireproof surface, let it cool completely, and research the safe removal process for that specific model before proceeding.
- Check the back of the phone for any bulge or warp
- Check if the screen is separating from the frame
- Feel for unusual warmth on the back panel
- If swollen: do NOT proceed with standard removal — handle as a hazardous battery
-
Set Up a Safe Workspace
Your environment matters as much as your technique. Work on a clean, hard, non-flammable surface. Keep liquids away from your bench. Have a fire-safe container nearby — a small metal tin or a LiPo-safe bag works perfectly. If anything goes wrong mid-repair, you need a place to drop the battery immediately.
- Clear your workspace of food, drinks, and clutter
- Work on a hard, flat, non-flammable surface (not a bed or couch)
- Place a LiPo-safe bag or metal container within arm’s reach
- Make sure you have adequate lighting — shadows cause tool slips
- Ground yourself with an anti-static wrist strap if available
-
Use the Right Tools — No Substitutions
This is where most beginners cut corners and regret it. A kitchen knife is not a spudger. A flathead screwdriver is not a pry tool. Metal tools near a lithium battery are a puncture risk. Always use plastic opening tools and plastic spudgers for battery removal. The $8 you save skipping a proper toolkit is not worth a swollen or punctured cell.
- Plastic spudger — for prying the battery connector off the board
- Plastic opening picks — for slicing adhesive around the battery
- Pentalobe or Phillips screwdriver — correct size for your model (look this up before you start)
- Suction cup — for lifting display assemblies without pressure
- Tweezers — non-conductive tips preferred near the board
- Isopropyl alcohol (90%+) — for softening adhesive safely
- Do NOT use metal pry tools, random flatheads, or utility knives near the battery
-
Disconnect the Battery Connector First — Always
Before you remove the old battery, before you do anything else inside that phone, disconnect the battery connector from the logic board. This cuts power to the board entirely. Failing to do this is the single most common cause of short circuits during phone repair. The connector is usually a small ZIF or press-fit connector held down by a metal bracket. Remove the bracket screws, lift the bracket, then gently lever up the connector with a plastic spudger — never yank it.
- Locate the battery connector on the logic board (consult a teardown guide for your model)
- Remove any retaining bracket screws with the correct driver
- Lift the bracket clear and set it somewhere you won’t lose it
- Use a plastic spudger to gently lever the connector straight up — not sideways
- Confirm the connector is fully seated away from its port before continuing
-
Remove the Old Battery Without Puncturing It
Most modern phones use strong adhesive strips to hold the battery in the chassis. Your two safe removal options are pull-tab adhesive strips (if present) or isopropyl alcohol to weaken the adhesive. Heat can also be used — but with strict limits. If using a heat gun or heat mat, keep temperature below 95°F (35°C) on the battery surface. Excessive heat accelerates battery degradation and can trigger thermal runaway. Never use a metal tool to lever the battery out from the sides or bottom.
- Check for pull-tab adhesive strips — pull slowly at a low angle (15–20 degrees) to avoid snapping
- If no pull tabs: apply a few drops of 90%+ isopropyl alcohol around the battery edges and wait 60 seconds
- Use a plastic card or plastic opening pick to slowly work under the battery from the non-connector end
- Apply gentle, even pressure — do not lever hard in one spot
- If the battery flexes or bends even slightly, stop and reassess — do not force it
- Once free, set the old battery aside in your metal container or LiPo bag
-
Verify the New Battery Before You Close Everything Up
Installing the new battery is only half the job. Before you seal the phone back up, you need to confirm the new battery is seated correctly and the device actually works. Skipping this verification step means reopening the phone if something is wrong — and every opening adds wear to the adhesive and the frame.
- Check that the new battery matches the original: same voltage, same capacity rating, same connector type
- Seat the new battery firmly in the chassis so it sits flat with no gaps
- Reconnect the battery connector to the logic board — press straight down until you feel a click
- Reinstall the connector bracket and screws before closing
- Do a quick power-on test BEFORE applying new adhesive or sealing the frame
- Check that the phone boots, the battery percentage appears, and the screen responds normally
- If all good: apply fresh adhesive or reassemble fully — you’re done
Bonus: Battery Disposal Rules (Don’t Skip This)
Lithium batteries cannot go in the trash or regular recycling. Tossing a lithium cell in a garbage bag has caused warehouse fires. Drop your old battery at any Best Buy, Home Depot, Staples, or local electronics recycler — they all take them for free. Tape over the battery terminals with electrical tape before transport to prevent accidental shorts.
Quick-Reference Safety Rules to Post at Your Workbench
- Always power off before opening
- Always disconnect the battery connector before touching anything on the board
- Never use metal tools to pry a lithium battery
- Never apply high heat directly to a battery
- Never work over a swollen battery without researching safe extraction first
- Always test before you seal
- Always recycle — never trash a lithium cell
Want to Go Deeper?
This checklist keeps you safe on one repair — the full Phone Repair Course teaches you how to confidently diagnose and fix screens, charging ports, cameras, and more on any phone model. If you want to turn this skill into a side income or just stop paying repair shops, this is your next step.
📥 Download This as a PDF
Create your free CPU Academy account to download the printable PDF version — plus get future free guides before anyone else.
Create Free Account & Download
Already have an account? Log in here.
Leave a Reply
You must be logged in to post a comment.